
The following stage, after setting the general attributes of the KYC Profile, is setting the profile’s Rules.
The Rules are, in fact, the components of the different checks performed by the Platform. The Platform allows you to choose if to apply them or not; and what score to assign to each one of them.
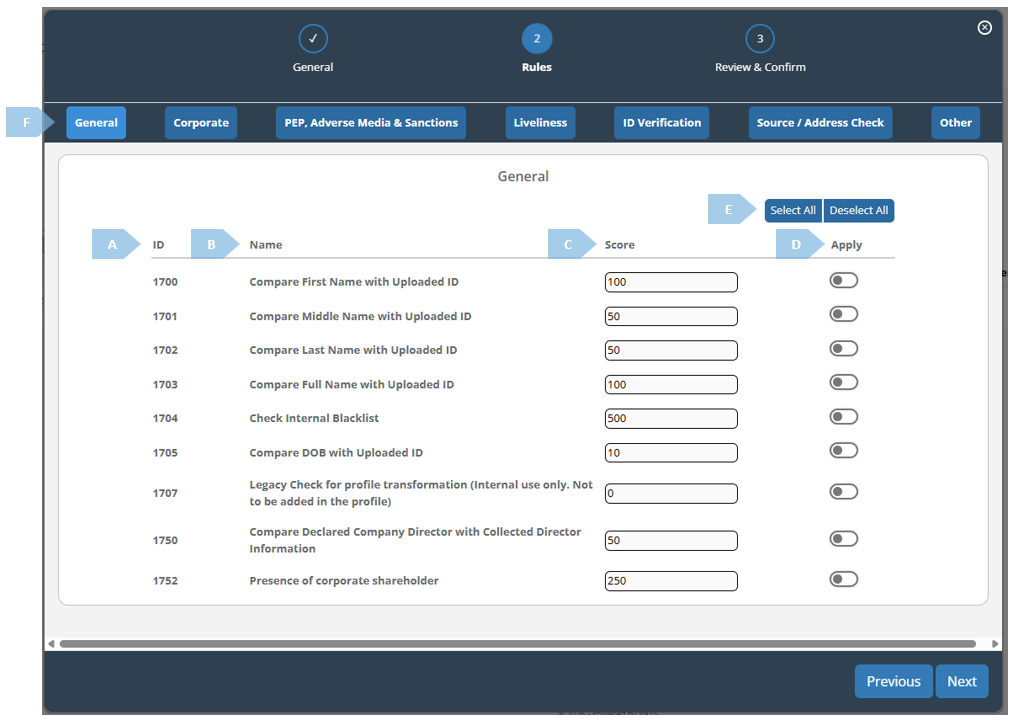
Here is a short breakdown of the different elements of the screen:
|
|
Element |
Explanation |
|
A |
ID |
Unique identifier that corresponds to a specific rule. |
|
B |
Name |
The name of the rule. The name indicates its essence / functionality. |
|
C |
Score |
The score represents the number of points allocated to each rule, which will influence the overall Red-Amber-Green (RAG) outcome when the rule is triggered. While the scores are pre-configured to a default setting, you have the flexibility to adjust these values according to your specific requirements. |
|
D |
Apply |
This toggle button enables you to easily assign a rule to, or remove it from the profile. |
|
E |
Select/Deselect All |
With these buttons, you can conveniently select or deselect all rules within a specific category in a single action. |
|
F |
Rules' Categories |
Each tab contains a collection of rules associated with a particular type of checks. Should you need to add, examine, or deactivate rules related to certain checks, you can simply switch between tabs and select the appropriate rules. |
TIP: To ensure a comprehensive understanding of the interrelationships between rules and to verify their correct configuration, you are encouraged to refer to the “Muinmos MASTER mCHECK™ Profile Rules” document, which includes a set of rules for our standard profiles. Additionally, should you require guidance on constructing a profile tailored to a specific verification objective, or on modifying or removing a profile, please reach out to us at care@muinmos.com.
Subject to the above recommendation to reach out to Support before modifying profiles, in order to modify a profile, one can select the desired profile and press the “Edit” button. This action will take you to the that specific KYC Profile’s screen, where you will be able to implement the necessary changes.
