
3.4. How to Create an Assessment
Now that we know how the assessments workspace looks like and how to customise it, we can start an assessment process.
An assessment process can be triggered either by:
Your client – directly from your website or via your CRM.
You – in one of two ways.
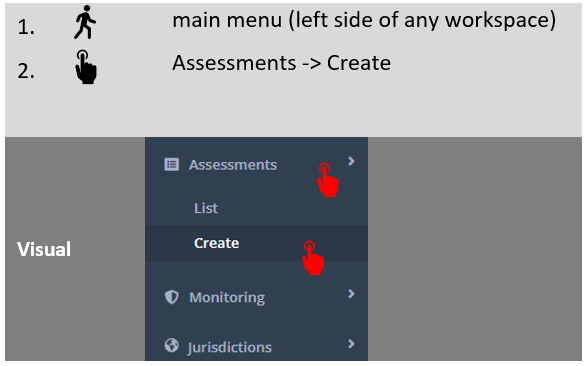
Option 1
Option 2
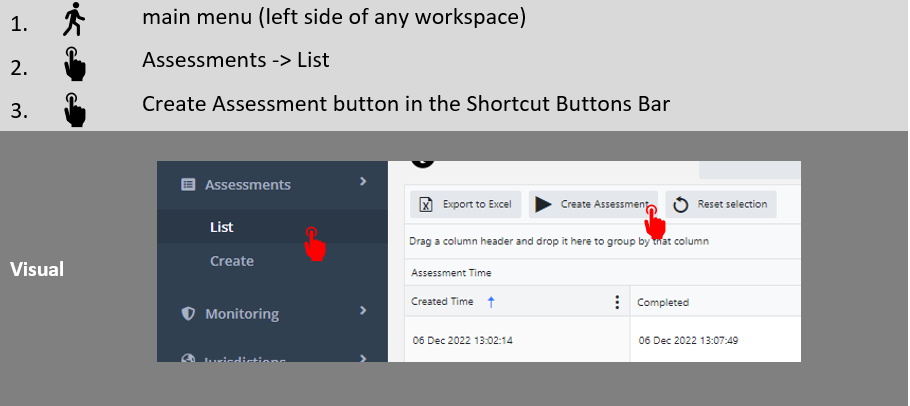
Whatever option you choose, the below “Create Assessment” screen will open.
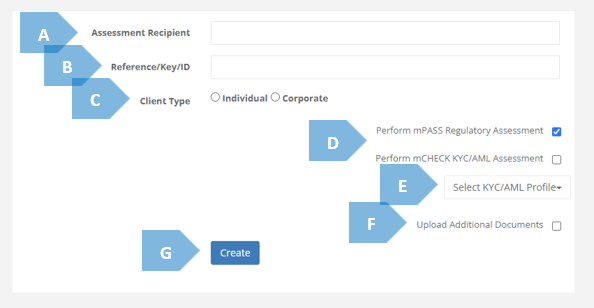
Here, you need to select the basic attributes of the assessment you want to create. These are laid out in the table below.
| Element | Function |
A | Assessment Recipient | Here you write the email address to which the invitation to take the assessment will be sent. This will normally be your client’s email address; but it can also be yours, in case, for example, you want to conduct the assessment on behalf of your client. |
B | Reference/Key/ID | Give the assessment a reference/Key/ID. This can help you to easily retrieve the assessment later on. For example: “John Dow Ind Full Aus” (which can be short for “John Dow Individual Full Assessment Australia”). Or, simply, your CRM reference key. In any case, consistency is very important here. |
C | Client Type | Tick the type of client to be assessed – individual or corporate. This simple choice is of course very important, as it will affect the entire assessment process. |
D | Perform mPASS™ Regulatory/ mCHECK™ KYC/AML Assessment | Tick what type of assessment you would like to perform – an mCHECK™ assessment, an mPASS™ one, or both. |
E | Select KYC/AML Profile | If you’ve ticked “Perform mCHECK KYC/AML Assessment”, you will be required to select which KYC/AML Profile you want the Platform to check. Upon opening the drop-down menu you will see various options – which have been previously configured for your Platform (under the configuration section_mCHECK_KYC Profiles). Each profile is set to check different things. For example, a basic individuals check profile may include IDV, POR, PEPs, Sanctions and AM. A basic corporate check profile may include Company Data, PEPs, Sanctions and AM. You can learn more about check profiles in Section 6.3.7 of this manual. Below you can see what this drop-down menu may look like: 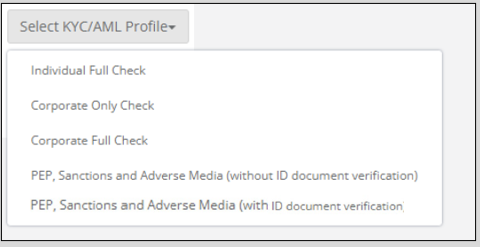 |
F | Upload Additional Documents | Before creating the assessments, you should also decide if you would like to ask your client to upload additional documents or not. Such documents can be company documents, source of fund, source of wealth etc. For more about this function and how to configure which additional documents can be asked, see Section 8.4 of this manual (note, that you can also request additional documents after you get the initial report. This can be done in the “Additional Actions” tab. On that, see Section 4.9 of this manual). |
Once you’re done with steps (A)-(F), press “Create”, and watch the magic occur!