
3.3. Customising the Assessments Workspace View
Before we dive into how to create and understand an assessment, we’d like to outline the various possibilities you have to customise the assessment workspace view.
At the top of each column, you will see three dots. Clicking on them will open the following menu:
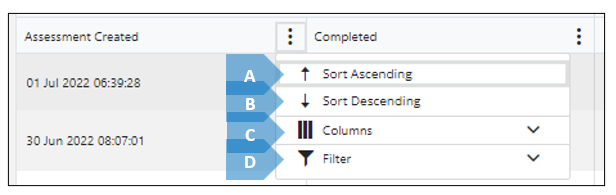
Below you will find an explanation of the various elements of this menu and their functions:
| Element | Function |
A | Sort Ascending | Arranges the assessments according to an ascending order (for example, in the “Assessments Created” column, it will put the first-created assessments on top, the second-created assessment below it, and so on and so forth. |
B | Sort Descending | The opposite of “Sort Ascending”. |
C | Columns | Allows you to choose the data you want to be visible on your assessment space. In order to perform this selection, click “Columns”. A drop-down menu will open, showing the different columns available. Check those you want to show on your assessments workspace, and uncheck the ones you do not want to show. 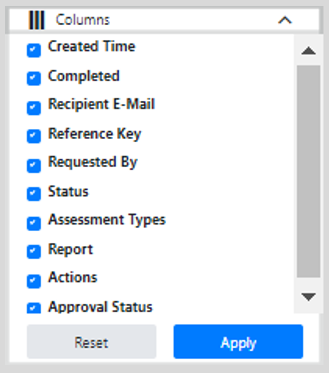 |
D | Filter | Filters the assessments according to various parameters. In order to activate this element, click “Filter”. A drop-down menu will open, showing two parameter fields, with an “And/Or” selector between them. 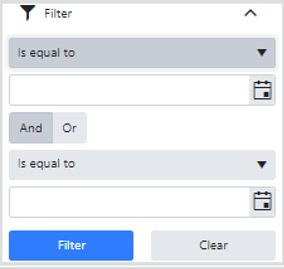 When you click the parameter field (denoted with “Is equal to”), a drop-down menu will open, showing you some other filtering parameters. These enable you to filter out irrelevant results from the assessments list. 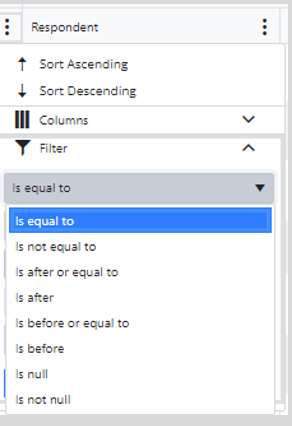 |
Another customisation option is column grouping. If you drag a column to the Column Grouping Area (marked “H” in the above screengrab), you can create groups of assessments, on the basis of the parameters of one or more columns. For example, you can group assessments by “Requested By”, “Approval Status”, and “Reference Key”, and the list would look like this:
